Polarise Pro
Simplify the process of crafting customisable polls for WordPress and seamlessly integrate them into your posts or pages.
Pro Plugins
What does Polarise Pro do?
Polarise Pro for WordPress lets you easily create configurable polls and add them to any posts or pages.
What settings can be applied to polls?
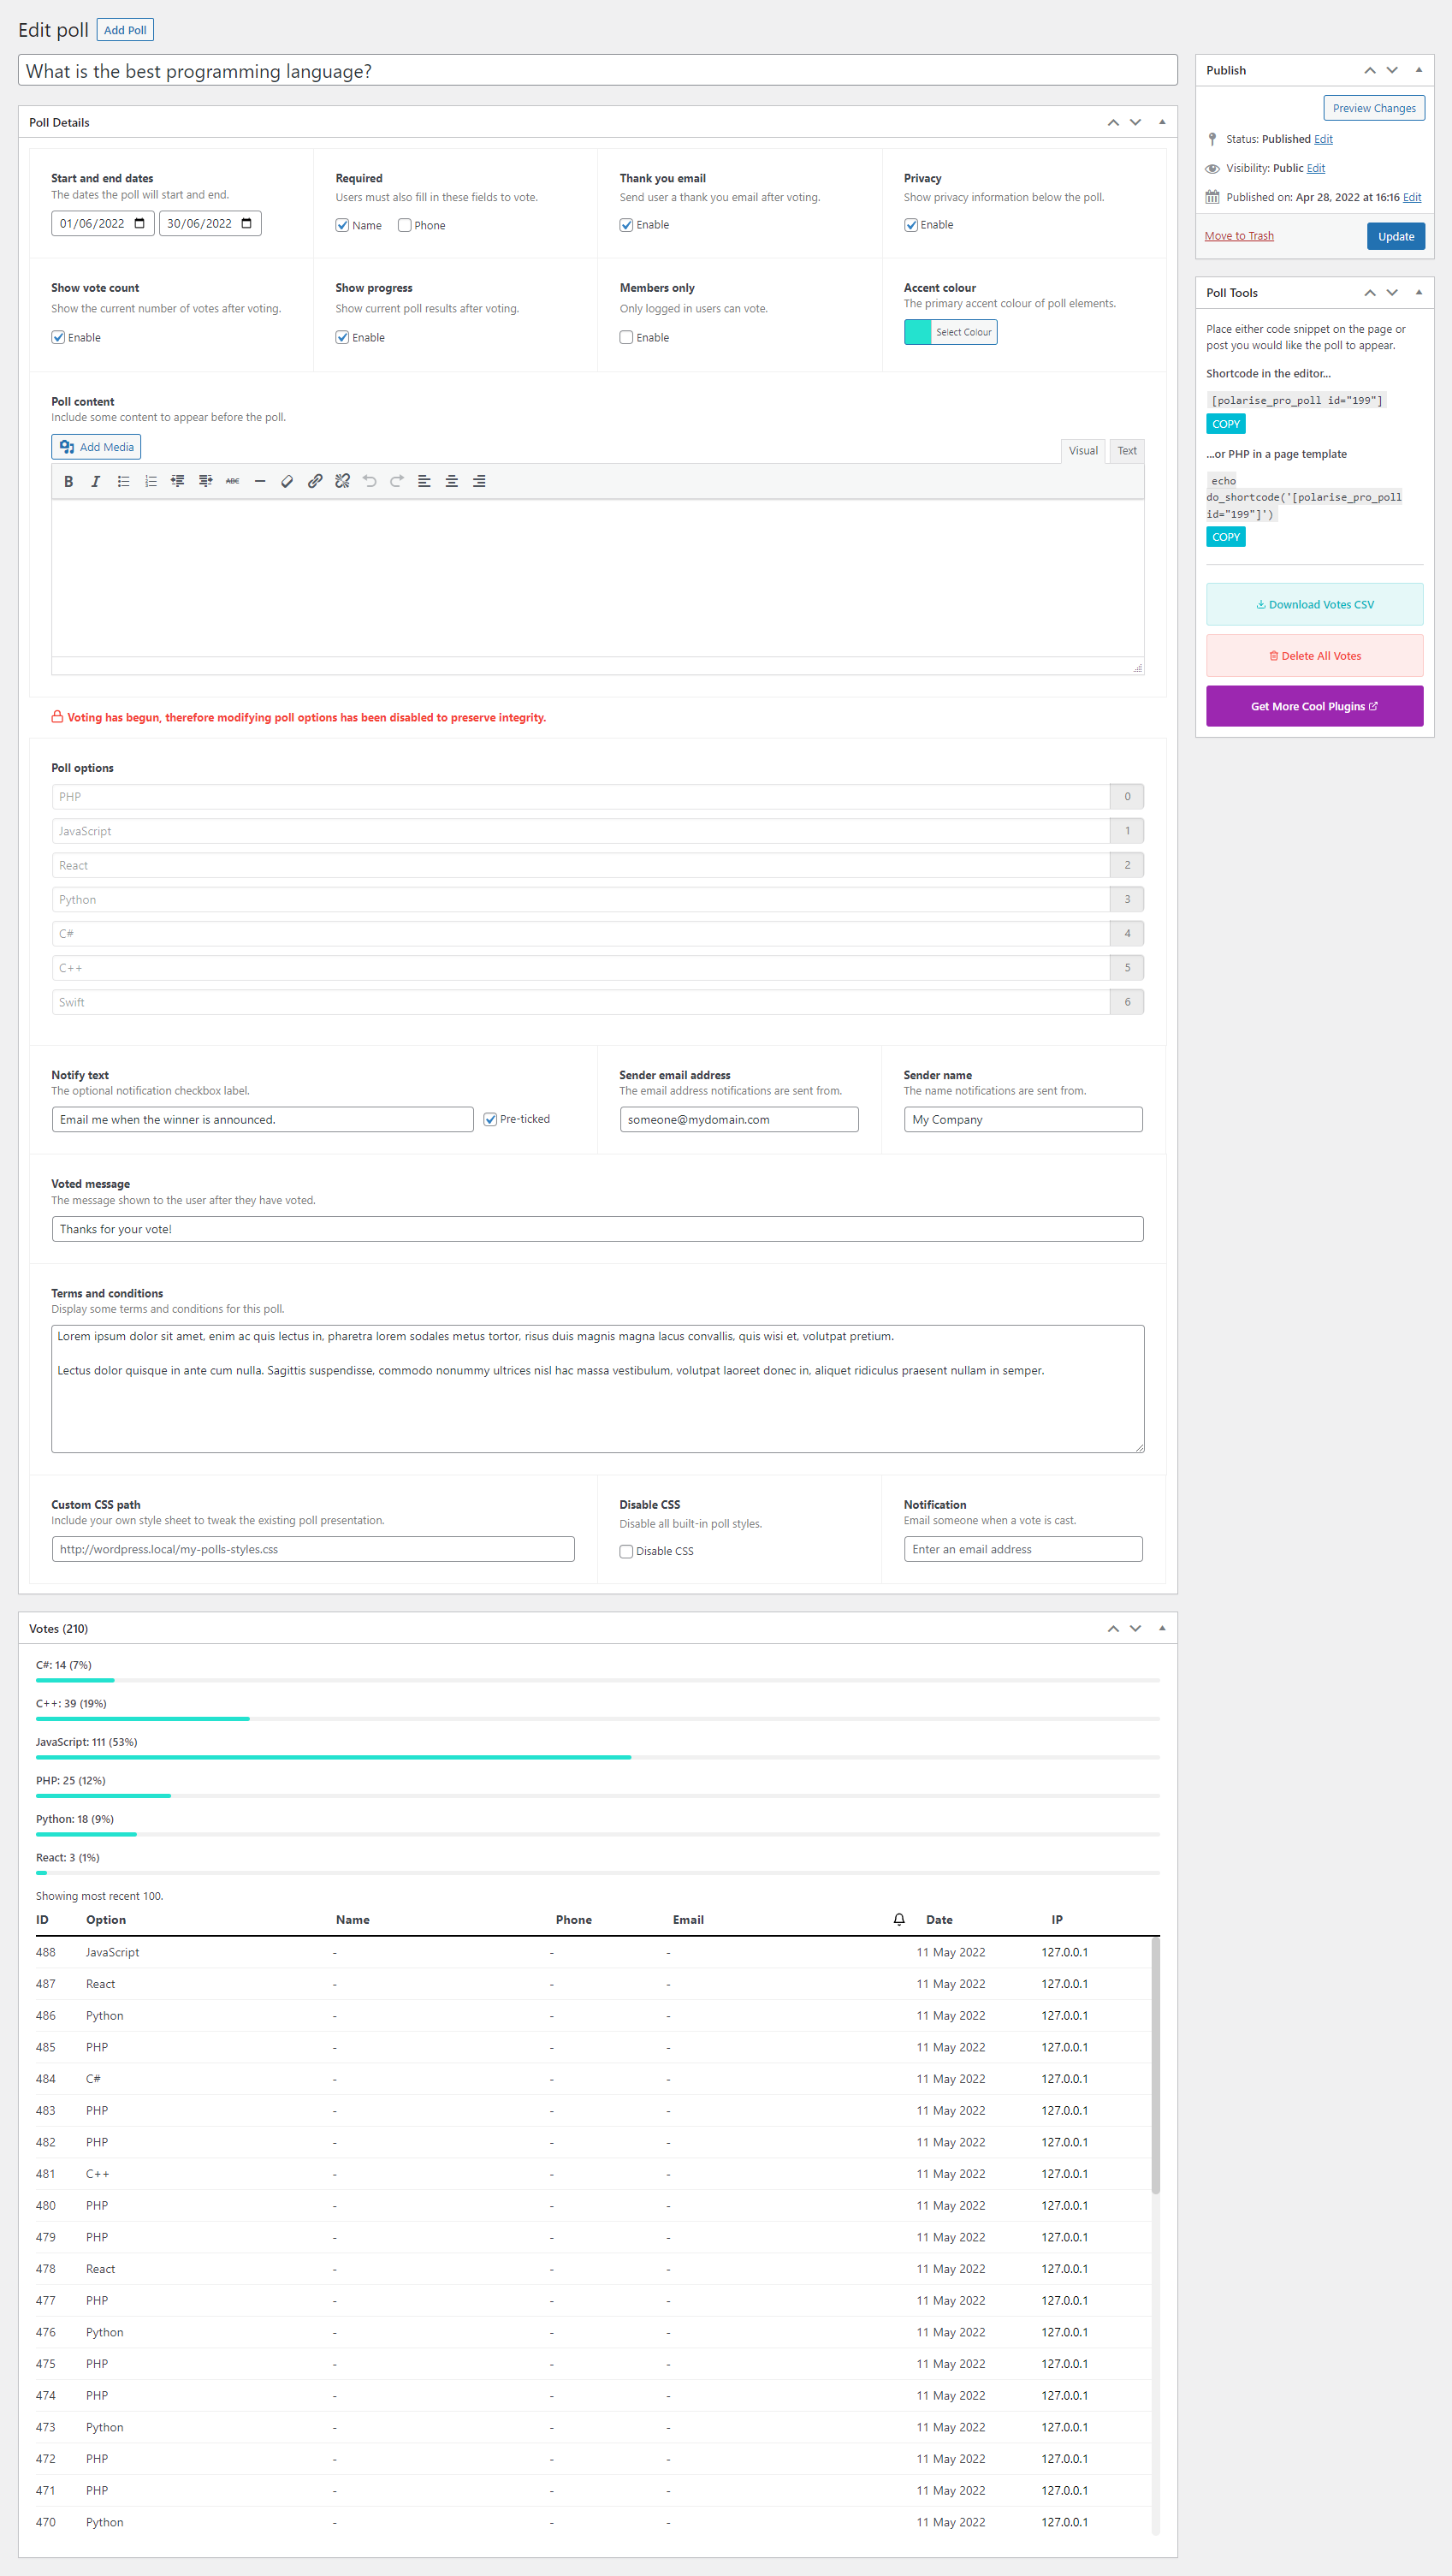
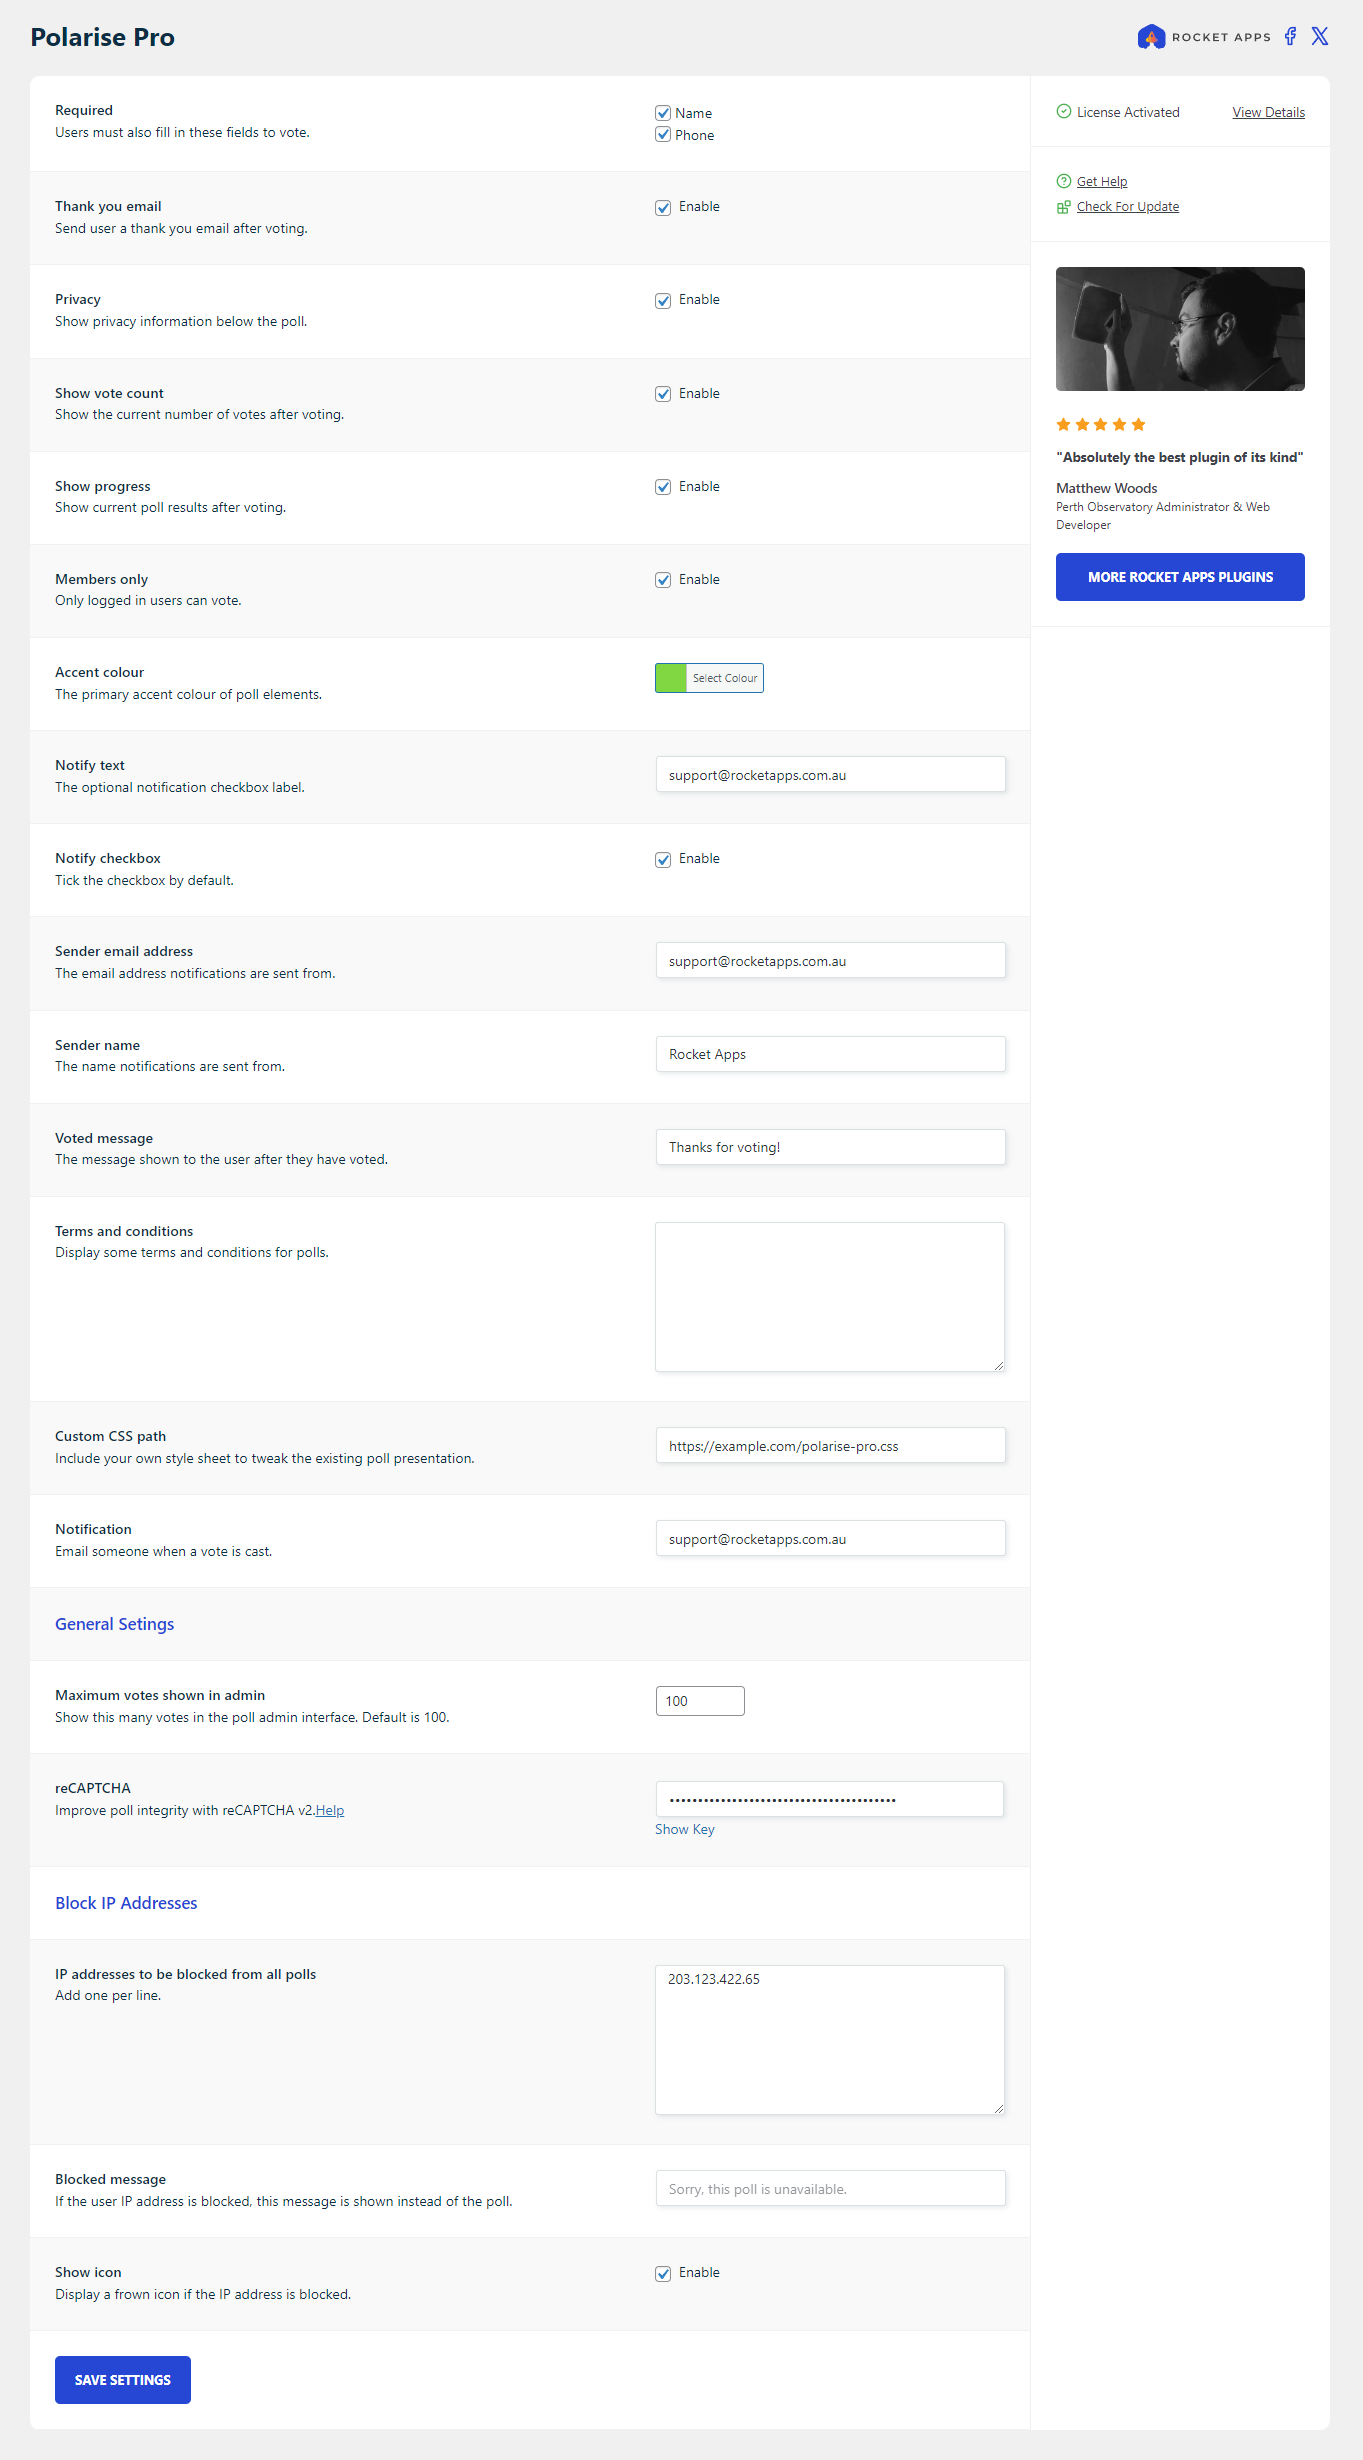
Each poll can have any or all of the following settings applied:
- Start and end dates: the poll will only be available between set dates
- Required form fields before voting is allowed: name or phone
- Send a thank you email: an email is automatically sent to the user after voting
- Display privacy information: shows the user what data is collected when participating in the poll
- Show the vote count: after voting, the user will be shown how may votes have been cast so far
- Show progress: after voting, the user will be shown the progress of the poll results so far
- Members only: only logged in users can vote
- Accent colour: the primary colour used to present the poll (learn about poll styles)
- Poll content: add any additional content to the poll
- Notify text: optional notification checkbox label (and option to pre-tick the checkbox)
- Sender email address: the email address that notifications are sent from
- Sender name: the sender name that notifications are sent from
- Voted message: the message shown to the user after they vote
- Terms and conditions: include any terms and conditions for the poll
- Custom CSS path: if you want to tweak the styles, include your own CSS file
- Disable CSS: completely disable all poll styles
- Notification: send an email to a specified email address every time a vote is cast
To make things easier, you can also specify poll defaults so that all new polls you create will begin with your preferred settings.
Default poll settings
To make things easier, you can specify your preferred poll settings by going to Settings -> Polarise Pro. Any settings you specify here can be optionally applied to any new poll you create.
To import the settings into a poll, simply create a poll and hit the Import From Settings button in the right pane.
Viewing poll results
The poll results can be viewed in WordPress admin at any time.
Only the first 250 results are shown by default (to not tax your database), but you can change that number in Settings -> Polarise Pro -> Maximum votes shown in admin.
You can also export a CSV of all results.
Exporting poll results
Poll results can also be exported to a CSV by hitting the Download Votes CSV button.

Note: The option to export to a CSV is only enabled if the poll has at least one vote. If the button is greyed out, it means nobody has voted in the poll yet.
Delete single or all poll votes
To delete a single vote:
- Edit the poll in WP Admin
- Scroll down to the Votes metabox
- Hover over the vote you want to delete and hit the red delete icon (you will be asked once to confirm this decision)
To delete all votes:
- Edit the poll in WP Admin
- Hit the Delete All Votes button in the right pane (you will be asked once to confirm this decision)
Note: Both these actions are permanent.
Adding a poll to a page
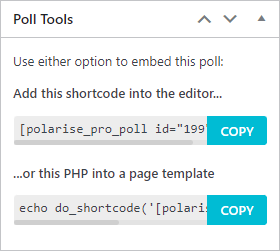
While editing a poll, the sidebar indicates a couple of ways to embed a poll onto any page or post.
Option 1: Paste the supplied shortcode into the editor (both classic and blocks editor are supported).
or…
Option 2: Paste the PHP directly into a theme template file (advanced use, recommended only if you’re comfortable editing code).
How many polls can be on a single page?
While you can run as many polls as you want across as many pages as you want, only one poll can be displayed per page.
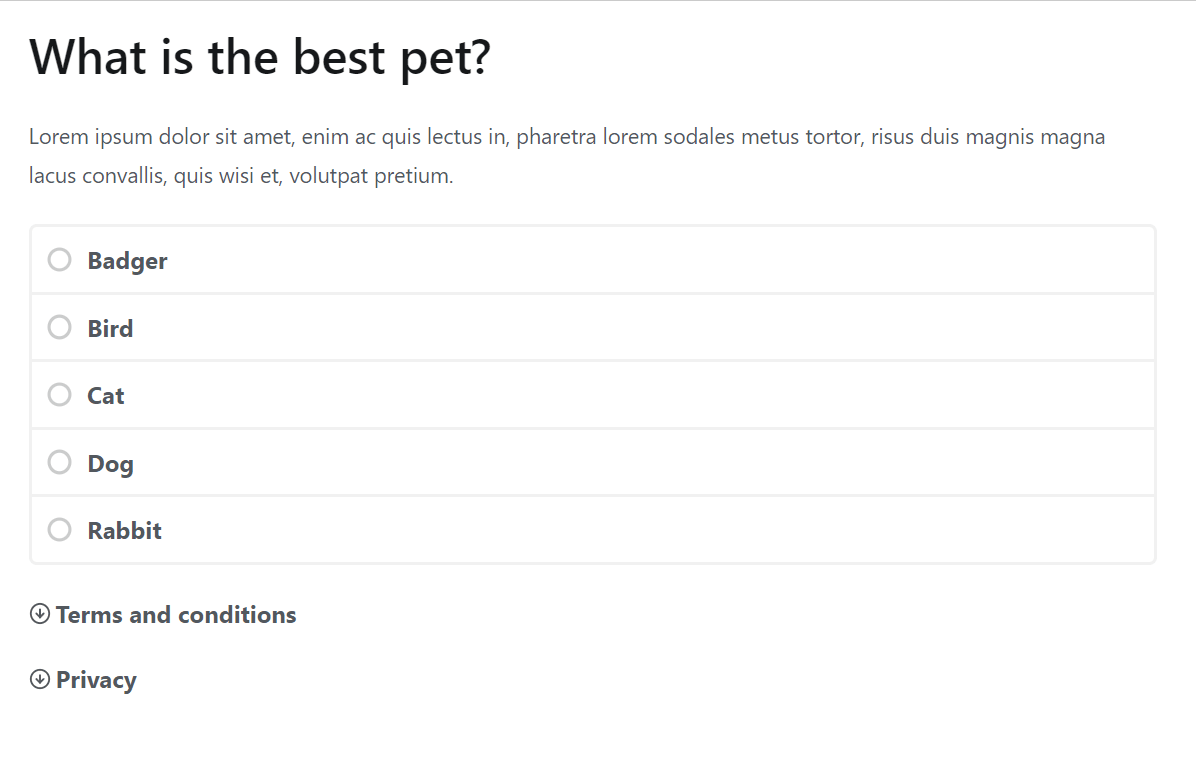
Poll styles
Unlike many other poll plugins, Polarise Pro does not offer a myriad of gaudy, tasteless themes that won’t fit the look and feel of your website.
Instead, you are offered the option to specify a single accent colour that will apply to minor parts of the poll interface, leaving the remaining parts to inherit the fonts and styles already being generated by your WordPress theme. This has the desired effect of making it look more like the polls are actually part of your website.
Additionally if you’re so inclined, you can tweak the poll CSS by including your own stylesheet (as a global setting or per poll).
Poll integrity
To preserve the integrity of the poll, you can not modify the poll options if at least one vote has been cast.
With this in mind, it is advised that you triple check (or have someone else check) your poll options before publishing.
Pro tip: If you really have to modify a poll option after a vote is cast, your only option is to delete all the votes for the poll in question.
Poll fudging
Although it doesn’t happen often, some users may make efforts to fudge (cheat) the poll results. Polarise Pro has four lines of defence in place to limit cheating.
First line of defence: Set a cookie
Polarise Pro will automatically set a cookie on the user device after they vote, preventing them from voting in that poll again from the same device. It should be noted that if the user deletes their cookies on the same device, they will be presented with the option to vote again (they would still need a different email address to vote though).
Second line of defence: Exclude votes from existing email address
Polarise Pro will not include votes from email addresses that have already been used to vote in the current poll. If a user does try to vote again with the same email address, the vote will not be recorded.
Third line of defence: reCAPTCHA
Google reCAPTCHA API will prevent any automated methods someone may employ to automatically cast votes. When reCAPTCHA is enabled the user is presented with a typical challenge which must be solved before they can submit their vote. To set up reCAPTCHA you will need a free site key. Learn how.
Fourth line of defence: Blocking IP addresses
Polarise Pro logs the IP address of all votes, and if you spot an obvious pattern where someone has made efforts to cheat the poll, you can block the IP address in question using the Block IP Addresses feature.
A note about seeing the same IP address multiple times
It’s perfectly normal to see votes from the same IP address. For example, users who are in the same household or users working from the same office. But if the number of votes from the same IP address is unreadably high, you may want to take action.
This is a judgement call you will have to make, as the number in question is arbitrary and really up to you. For example, if there are hundreds of votes from the same IP address and the email addresses look spammy, there’s a good chance some cheating is happening.
If you check the poll votes, it’s often obvious when cheating is in play. To cite an example, you may see a few consecutive votes that appear to be from the same person on the same IP address, like this:
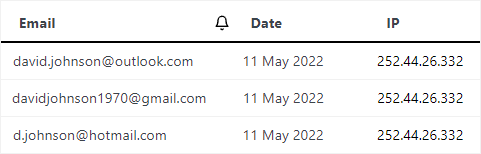
While these are possibly real email addresses, common sense dictates that there’s an excellent chance they all belong to the same person, and this person has voted three times with three email addresses that he owns. It’s now up to you if you want to delete all those votes and perhaps block the IP address as well.
Additional ways to limit poll fudging
Generally speaking there probably won’t be any or perhaps just limited poll fudging. But just in case, further ways to mitigate are:
- Include deterrent language in the terms and conditions specifically stating that any obvious instances of cheating will be deleted, disqualified and blocked.
- Export the poll results to a CSV and remove any instances of obvious fudging, and use this as your source of truth.
Viewing the in-progress poll results might give you a good indication about any potential fudging (for example, several votes that are obviously from the same user as demonstrated above), and you can use your better judgement on what to do about it.
How to block IP addresses
Adding an IP address to the blocked list will apply to all polls. Typically you would do this in an effort to prevent nuisance users from participating the polls.
To block an IP address
- Go to Settings -> Polarise Pro
- Scroll down to Block IP Addresses
- Enter as many IP addresses as you want (one per line)
- Hit the Save Settings button
To unblock an IP address, simply delete it from the list.
You can also optionally display a message to users who have been blocked.
How to setup reCAPTCHA
Setting up reCAPTCHA only takes a couple of minutes.
- Login with your Google account here.
- Hit the + icon in the upper right to create a new key.
- Enter a label (it can be anything, but your domain name is ideal).
- Select reCAPTCHA v2 and then select “I’m not a robot” tickbox.
- Below the Domains heading, add your website domain. This will restrict the use of the reCAPTCHA site key to your website only.
- Accept the terms of service.
- Untick the Send alerts to owners option.
- Hit the Submit button.
You will then be presented with a couple of keys, but we are only interested in the site key:

Now login to WordPress admin and go to Settings -> Polarise Pro, scroll down to reCAPTCHA and paste in your site key. Click Save Settings.
With reCAPTCHA enabled, users will be forced to solve a challenge before they can vote.
Important: DO NOT use your secret key by accident. Only use the site key.
Note: At the time of this publication, Google’s free tier allows up to 1 million reCAPTCHA assessments per month. If you somehow exceed that limit, they will ask you to set up a billing account.
Privacy
When casting a vote, the following information is saved to the database:
- The vote that was cast
- The date the vote was cast
- The IP address of the user who cast the vote
- The email address of the user
- The name of the user (only if you enable the option)
- The phone number of the user (only if you enable the option)
- The option to be notified of poll results (if the user ticks the checkbox)
If you enable the Privacy setting on a poll, information is dynamically generated and shown to the user.

Pro tip: Be sure to comply with any privacy jurisdictions in your country. It is recommended you include additional language in your website privacy policy regarding how polls are used and what data they collect.
Where do I enter my license key?
In WordPress admin, go to Settings-> Polarise Pro and enter your license key. Once activated, you will be able to begin creating polls.
How many websites can I use Polarise Pro on?
A single site license allows Polarise Pro to be used on a single domain, although you can purchase a multiple site license if desired.
Is the plugin price a one-time payment or an annual subscription?
The choice is yours.
Twelve months after your initial purchase you will have the option to renew your support license, but it’s not mandatory.
Should you decide not to renew your support license, your product will continue to function without any limitations. However, it won’t receive updates or be eligible for support until you renew.
Changelog
1.2.2 (22nd May 2023)
- Improvement: Easy access to settings page after plugin activation.
- Fix: Issue where license expiry notice was replicated several times.
1.2.1 (5th April 2023)
- Fix: Several agnostic presentation edits.
1.2.0 (23rd March 2023)
- Fix: Missing translation strings.
- Improvement: Force formatting of blocked IP addresses.
- Improvement: General maintenance.
- Improvement: Removed some CSS to give priority of theme styles.
1.1.0 (14th March 2023)
- Improvement: Block IP addresses.
- Fix: Issue where emails were sent as plain text.
- Minor text edits for clarification.
v1.0.0 (28th June 2022)
- Initial release.


- Version: 1.2.2
- Updated: May 22, 2023
- Required: WordPress 5.0+
Shop With Confidence Get a refund within 30 days, no questions asked.
Help Topics
- What does Polarise Pro do?
- What settings can be applied to polls?
- Default poll settings
- Viewing poll results
- Exporting poll results
- Delete single or all poll votes
- Adding a poll to a page
- How many polls can be on a single page?
- Poll styles
- Poll integrity
- Poll fudging
- How to block IP addresses
- How to setup reCAPTCHA
- Privacy
- Where do I enter my license key?
- How many websites can I use Polarise Pro on?
- Is the plugin price a one-time payment or an annual subscription?
- Changelog
